The Future Tutors course has finally commenced and over the past week I have attended the first 3 days. These first days were an organised orientation program introducing us (the new students) to the workings of Royal School of Needlework, its Staff, and more generally to Hampton Court Palace.
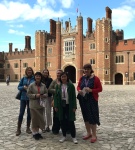
After security passes were issued there were 3 days of tours and introductions to various sections of the school and the many wonderful people who keep the whole place running. There was an interesting lecture on the history and goals of the school from the CEO, and an opportunity to see some beautiful historical embroidered items.
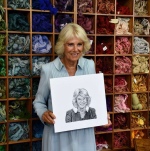
There was a seek peek at the new RSN Faces and Figures exhibition – just before the visit and opening by the Patron – The Duchess of Cornwall. The exhibition has many really spectacular embroideries and I was particularly taken by the detail in many of the Shaded Blackwork pieces.

One particular highlight of the week for me was collecting our crate of Embroidery supplies, as these are the items we will be using for each of our embroidered pieces over the next three years. The crate was full of all sorts of items that any embroiderer would treasure such as slate frames and hoops, scissors and art supplies, tools such as a screwdriver and a stanly knife along with tweezers, mellor, stiletto, pins, and lots of needles. I had a relaxing afternoon unpacking and labelling every item before storing them all away in my allocated work crate.
Needle Books at the ready…
In preparation for the course we had been asked to make ourselves a Needlebook with at least ten pages, and after seeing the package of needles provided in our supplies crate I understood the reason for needing such a large needle book.
In designing my needlebook, I decided to use a book binding technique with a folded fabric spine, in order to accomodate the thickness of the ten wool felt pages. I used a cranberry coloured 28 count linen for the cover and a coordinating batik cotton for the lining and folded spine. Six of my pages are made are made from a pack of Sue Spargo felted wool pieces and I added in 4 more pages from wool fabrics in my stash to make the required 10 pages.
For some reason I had decided to decorate my Needlebook with Caselguidi embroidery. I have no idea why I choose this though I do like the combination of the pulled background ( in foursided stitch) and raised surface work that creates the Caselguidi look – however the embroidery does take a considerable time to complete. The design is my own, though it is based on traditional motifs.
Once I had completed the embroidery on the front, I made up the cardboard book binding, and inserted the pages and linings. I then added labels to each of the pages to help me identify the needles. I had obtained these woven labels a few years ago from ‘Plays with Needles’ on Etsy, though I am not sure if they are available any longer. A magnetic closure, which I found at a local bead shop, finishes of the needlebook and hopefully keeps my needles safe.


Magnetic closure

Each page labelled.
After a few wonderful introductory days, the coursework starts in earnest this week!

Great to see the needle case finished as you were working on it last time I saw you at the guild. Hope all keeps going well.
Cheryl
LikeLiked by 1 person
What an impressive needle book! It looks really good and quite pleasing to the touch. You’ll enjoy using it, I’m sure! It looks as if you have a needle holder attached to the cover! Thanks for the photos.
LikeLiked by 1 person
Love your needlebook and love that you have labeled all of the pages! It is really nice to read about your experiences of the future tutor course. I hope you will have time to post regular updates in between all of the stitching that is required. Very jealous of your big box op supplies for the course! It is very different from the starterpacks we get sometimes, and they are already fun! See you in a months time!
LikeLiked by 1 person
Love the different coloured pages and the labels in your beautiful needle book. It all sounds like a magical experience.
LikeLiked by 1 person
Wonderful to read about Week 1 of your journey. Camilla in blackwork- there’s a challenge! Fabulous needle book. Will you include a photo of it in the last week of the course? I am sure it will have a patina full of needles and many, many stories. Stay well and thank you for taking us along with you. X
LikeLike
Great idea to take a photo at the end, thank you. I hope I remember!
LikeLike
Sally – it’s been great to read about your preparations for the embroidery school and now you’re ready to go! how exciting for you. As a member of the Aussie Rumakers Guild – do you mind if I snip a couple of your images from your blog and share them with the Guild along with a note about what you’re doing ?
Cheers Jo Franco – Editor/Membership Chair
On Mon, Sep 9, 2019 at 8:42 AM Stitched up with Thread wrote:
> Sally posted: “The Future Tutors course has finally commenced and over the > past week I have attended the first 3 days. These first days were an > organised orientation program introducing us (the new students) to the > workings of Royal School of Needlework, its Staff, and ” >
LikeLike
No problem Jo. Thanks for reading.
LikeLike
Lovely to hear about your first few days at RSN and the crate of supplies—how very exciting. Love your new needlebook and wish I could embroider things in such a short time frame. Good luck for the time ahead. xxoo
LikeLiked by 1 person
Fantastic needle case love the colour of the pages too!
Love reading your reports on your challenges on your new school years. Cheers x
LikeLiked by 1 person
Gorgeous needle work book – so jealous of your journey. Keep us posted!
LikeLiked by 1 person